
Ingredients:
1 Gallon of Spring Water (room temperature, do not get refrigerated)
3 pounds of honey – pure unprocessed
1 balloon big enough to stretch over the mouth of the spring water jug
2 ½ tsp Yeast (1 Package)
25 raisins (1 small box)
1 Orange
(Scale if necessary to weigh honey)
3 pounds of honey – pure unprocessed
1 balloon big enough to stretch over the mouth of the spring water jug
2 ½ tsp Yeast (1 Package)
25 raisins (1 small box)
1 Orange
(Scale if necessary to weigh honey)

Making the meade:
Ok, so I have to weigh the honey ‘cause we have it in gallon jugs… but it is about a quart (a little more). Pour about half of the water from the jug into a clean container. Slice up the orange into eight slices. Put the oranges, honey, twenty-five raisins (I used a few more than that), and the yeast into the jug.
 |
| Looking down inside the jug with raisins, oranges and water. |
Pour some of the water back into the jug so the level is a couple of inches from the top.
 |
| All ingredients before shaking, see honey in the bottom and oranges floating on top. |
Put the cap on the jug and shake it up well. If you can, you should shake it for a good five minutes. This will aerate the mixture. The yeast really needs lots of oxygen to grow well.
 |
| After shaking |
Poke a pinhole in the top of the balloon with a straight pin or needle, remove the cap from your jug and put the balloon right over the mouth of the jug. Stretch the open end of the balloon right over the jug so that as the gases form inside the jug they will inflate the balloon. (This works for making vinegar, too!) Put a rubber band or tape around the neck to keep it firmly in place so it won’t come off. I also removed the little ring that was left from the lid to ensure that the balloon stayed on. Leave the jug on a counter for the first day so you can monitor it. Up to this point it took me about 10 minutes. Now we wait.
 |
| Sitting on the cupboard with the kefir. |
Now, somewhere between an hour and twenty-four hours later the balloon will start to inflate. This means that your yeast is growing and transforming the contents of the jug into wine. Gases are forming inside the jug and are escaping through the pinhole. This setup insures gases escape but no contaminants get into your wine. If the balloon is getting big you may need to poke another hole or two in it. You don’t want it to burst. It would leave your meade open to contamination.

Once you are satisfied that the gases are escaping and the balloon is not under unusual stress you can set the jug in a cool dry place like a kitchen cabinet or pantry shelf. Check on it every day if you can, just to make sure it is ok and the balloon hasn’t popped off. I exploded a gallon jug of vinegar once in the pantry, so keep an eye on it daily.

Once you are satisfied that the gases are escaping and the balloon is not under unusual stress you can set the jug in a cool dry place like a kitchen cabinet or pantry shelf. Check on it every day if you can, just to make sure it is ok and the balloon hasn’t popped off. I exploded a gallon jug of vinegar once in the pantry, so keep an eye on it daily.
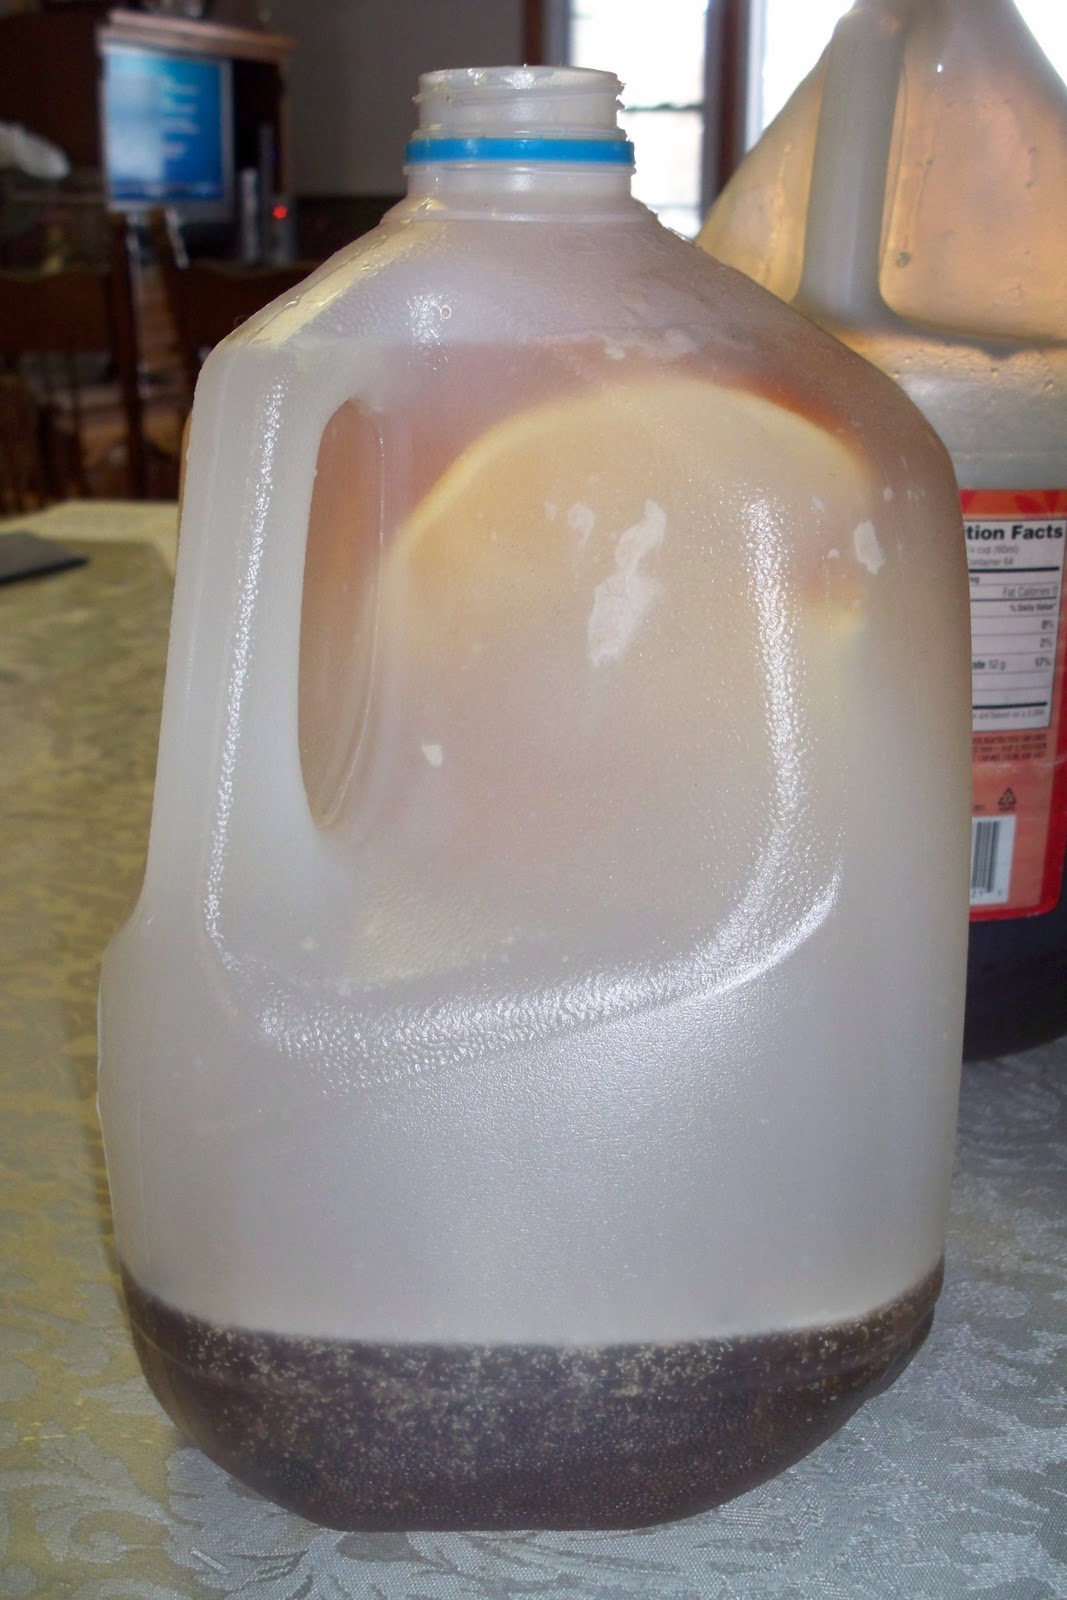
After two to three weeks the major portion of the fermenting will be done and the balloon will be limp. Transfer the liquid to a glass jug leaving the orange slices and raisins behind. Put the balloon on the new jug. This process is called racking and it will move your meade along nicely. You can taste a little bit to see how it is coming along, but it isn’t really a tasty wine at this point. It needs another couple of months to start to get delicious. Over time, as you check on it you will notice that the cloudiness disappears and it slowly clarifies and transforms into wine.
The Orange and the raisins can stay in the mixture for the whole duration but if you want to make the meade a little milder and help it clarify faster you can transfer the liquid into the gallon jug with the balloon on it.
Some Tips
You can make the honey easier to pour by letting it stand in a sink or bowl of warm water. And you can experiment with the flavor a bit by adding a cinnamon stick or a pinch of nutmeg, one or two cloves or other spice or fruit to the batch when you add the orange. Be careful, cloves are very strong so don't put more than 2. Don’t leave the raisins out. They are not there for taste. They are necessary for the yeast because honey is a bit low in the nutrients that yeast like. If the honey is a bit expensive you can cut this down to two pounds. Any quantity between two and three and a half pounds will work well and the more honey you put the sweeter the meade will be. But, the more honey you put the longer it will take to mature.
You can make the honey easier to pour by letting it stand in a sink or bowl of warm water. And you can experiment with the flavor a bit by adding a cinnamon stick or a pinch of nutmeg, one or two cloves or other spice or fruit to the batch when you add the orange. Be careful, cloves are very strong so don't put more than 2. Don’t leave the raisins out. They are not there for taste. They are necessary for the yeast because honey is a bit low in the nutrients that yeast like. If the honey is a bit expensive you can cut this down to two pounds. Any quantity between two and three and a half pounds will work well and the more honey you put the sweeter the meade will be. But, the more honey you put the longer it will take to mature.
Be patient and taste your meade every few weeks. It should be really clear and delicious after a few months. It will continue to age and improve over a long period of time so the longer you wait the better it will get. If you are struggling with this then you should probably make another batch! Try to wait six months if you can!

I am coming back here to try this out (when a little space opens...in my brain). :-)
ReplyDeleteThanks for posting it. Much Love, p
I met you at SH&H last week at pickup, and you told me about this. I read it then, and did it yesterday from memory. Oops-- only used 16 raisins. Is it OK to add them now? Also, is it Ok to shake it the second day?
ReplyDeleteThis should be an interesting experiment....
BH
Hi Beth! Sure you can add the raisins today, tomorrow... shake it up, no problem! Actually, bacteria like to be shaken (learned that from my kefir!) Next time try other fruit, more or less, grapes, Kiwi! Have fun!
ReplyDeleteCB